View Reports of Users
SentryPC can create three different sleek, easy to follow reports that detail user settings, activity monitoring, and usage. The user summaries reports are accessible by clicking on 'User Summaries' in the Admin Control Panel. Each report can be printed quickly by clicking on the 'Print this Report' link given within each report.
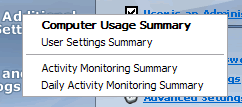
Computer Usage Summary
This report will display how long the user has used the computer for the current week, and how much time they have remaining. The report will then list all of the time management settings and schedules that have been set for the user. Lastly, the report gives a Filter Activity Summary, which shows all of the filter violations (such as running a restricted program) that the current user has violated recently.
Activity Monitoring Summary
This report will produce the most amount of information in regards to what the user has been doing, and when. The first part of the report will outline all of the activity monitoring settings in place. The second part of the report will show you how many items have been logged for each activity monitoring category. For example, it will list how many keystrokes were typed, how many windows were interacted with, how many websites were visited, etc. Lastly, the report will give you a detailed timeline of everything the user has done, in chronological order. This report will show website visits, program starts, program stops, filtered events, windows viewed, and so forth.
Daily Activity Monitoring Summary
This report will produce information in regards to what the user has been doing for the day you specify. The report format is the same as the Activity Monitoring Summary.
User Settings Summary
This report will give you a detailed list of all the settings for the current user. The report will list all of the scheduled times for time management, each filter for applications, websites, and chat client filtering, and it will list all of the activity monitoring settings.