Installation Guide
The following instructions will ensure that SentryPC is installed and working properly on your system. Make sure to follow the instructions carefully and you will be up and running in no time. If you run into any problems please contact our staff with specific details and we will be glad to help you.
NOTE : These instructions are for SentryPC 2.x only.
Step 1 :
It is important that you install SentryPC and follow these instructions from an Administrator account of Windows. Please refer to Windows Users Accounts from the Windows control panel to ensure your user account has Administrator privileges before continuing. It is also best practice to install the software on a Windows account that you do not plan on controlling by SentryPC after installation.
Before downloading your install file you will want to temporarily disable any anti-virus scanners you have on your system. Some scanners may prevent the download if not disabled during this time. This is not because SentryPC is malicious, but because the scanners misinterpret its monitoring aspects as so.
Now you can go ahead and download your install file. Make note of the location you save it on your hard drive. At this time you may want to copy the install file to disk, CD, flash drive, etc. as a backup — this is optional of course, but recommended should you need it in the future.
Step 2 :
Before installing the software you will want to exclude SentryPC's files from any scanner(s) on your system. It is important to note that this must be done for every scanner you have on your system as some people have multiple installed on their computer. We have written two guides for this process which you can refer to :
- Which files need excluded and why they need excluded in the first place.
- Instructions for excluding the files with some of the most popular scanners on the market.
Step 3 :
If using Windows Vista, 7, or 8 then you will want to disable User Account Control. This is usually not required, however, some systems may require this due to their setup and configuration.
Step 4 :
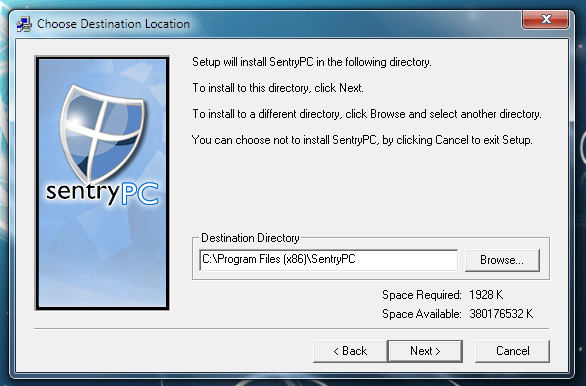
It is time to install. Navigate to the location you saved your install file and double click the executable with your mouse to begin the install process. Follow the onscreen prompts until you reach the window below. Depending on the Windows version you are using the installation directory displayed may or may not be the same as shown. We advise leaving the install location to the default listed by the software. Click 'Next' to continue.
Note : While you can choose a different location to install you must select one which is accessible by all users of the computer and for which those users have full permissions. If they do not then the software will not function properly. It is for this reason we advise leaving the install location to the default.
Step 5 :
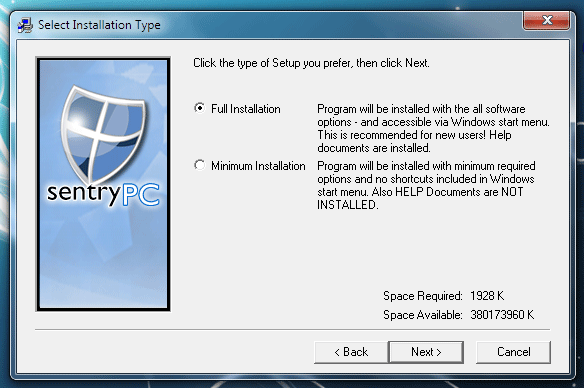
You will now be shown the setup options — choose which you prefer. If you are worried about having a shortcut in your Start Menu with the Full Installation remember that you can always delete it later. Most users will want to select 'Minimum Installation' so the software stays hidden to users. Click 'Next' to continue.
Step 6 :
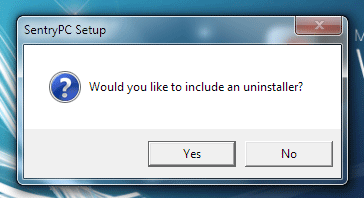
You are now presented with the option to include an uninstaller. Selecting 'Yes' will add a shortcut to your Start Menu to uninstall as well as the ability to uninstall through Add/Remove Programs in the Windows Control Panel. Due to this fact most users will want to select 'No' to prevent unauthorized tampering/uninstalling as well as keeping the software hidden.
Note : Even though you select 'No' the software can still be uninstalled, but only by you personally. You can view instructions for doing so in our Help Documentation.
Step 7 :
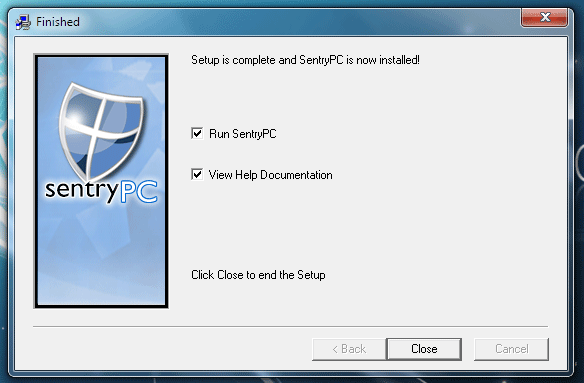
Setup is now finished. If you do not select 'Run SentryPC' then you will need to manually start it from your installation directory or restart your computer. For sake of ease make sure this option is checked and click 'Close' to continue.
Step 8 :
You will now be prompted to enter your SentryPC password as shown in the image below. Please select a password that you will remember as this will be needed to access the control panel and other areas of SentryPC — you can enter a hint for yourself as well.
Step 9 :
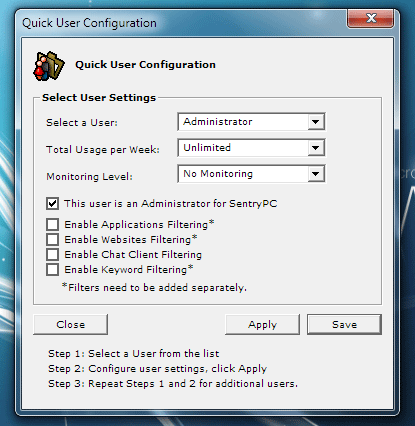
Now that your password has been set you will be presented with this screen. In this example the user selected is 'Administrator', however, you will want to make sure YOUR user account is selected. We recommend the following settings for YOUR account :
- Total Usage per week : Unlimited
- Monitoring Level : No Monitoring
- Make sure you check 'This user is an Administrator for SentryPC' box.
- Filtering options are NOT selected.
The reason for these settings is you probably do not want to monitor or restrict your own account. This also prevents problems locking your own account out of the computer due to time constraints.
Click 'Apply' and then 'Save' to continue. You will be able to choose settings for your other users after the next step through the control panel.
Step 10 :
Your installation is now complete. You will now be shown the Central Command window where you can begin entering your settings. Please refer to the Help Documentation which will walk you through all areas of the software.
Note : Remember to turn your scanner(s) back on or simply restart your system (most will turn back on by doing so). Also, remember you can use your hotkey (by default this is 'control-alt-shift-m' on your keyboard) to open SentryPC. Your hotkey can also be changed in the settings as well.
